
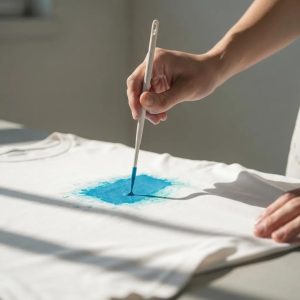
Starting home screen printing is exciting for creative people. With the right tools, you can turn your ideas into art on shirts. DIY t-shirt printing lets you make unique clothes from home.
Starting with screen printing doesn’t have to be hard. Focus on the basic tools to set up a good workspace. Good equipment helps you get professional results, even if you’re new to t-shirt printing.
Key Takeaways
- Basic equipment is essential for successful home screen printing
- Quality tools improve the outcome of DIY t-shirt printing projects
- A proper workspace setup enhances efficiency and safety
- Beginner-friendly supplies make the learning process easier
- Investing in the right screen printing equipment saves time and frustration
Essential DIY T-Shirt Screen Printing Equipment for Beginners
Starting your DIY t-shirt screen printing journey requires a few key pieces of equipment. Let’s explore the essential tools you’ll need to create professional-looking prints at home.
Screen Printing Frame and Mesh
Screen printing frames are the core of your setup. You can choose between wooden or aluminum frames, depending on your needs and budget. The mesh count is key – lower counts (110-160) are good for simple designs, while higher counts (200-305) are better for detailed artwork. Try out different mesh counts to see what works best for you.
Squeegee Types and Sizes
Squeegees push ink through the mesh onto your fabric. The durometer (hardness) of the squeegee matters – softer ones (60-70) are best for fabrics, while harder ones (70-80) are better for smooth surfaces. Pick a size that fits your frame well for even ink distribution.
Basic Printing Inks and Emulsions
When it comes to inks, you have two main options: water-based inks and plastisol inks. Water-based inks feel softer but need heat setting. Plastisol inks are more durable and easier to work with. For making your stencils, use photo emulsion. This light-sensitive material helps you transfer designs onto your screen accurately.
- Water-based inks: Eco-friendly, soft feel
- Plastisol inks: Durable, versatile
- Photo emulsion: Creates precise stencils
With these basic tools, you’ll be ready to start your screen printing adventure. Remember to practice and adjust your technique as you gain experience.
Setting Up Your Home Printing Workspace
Creating a good screen printing workspace at home needs careful planning. A well-organized setup boosts productivity and keeps you safe. Let’s look at the important parts of a functional printing area.
Proper Lighting Requirements
Good lighting is key for screen printing. Put in bright, overhead lights for overall visibility. Use yellow or red safelights in your darkroom to protect sensitive emulsions.
Position task lighting near your work area for detailed tasks.
Ventilation and Safety Considerations
Having the right ventilation systems is vital in a screen printing workspace. Install exhaust fans to clear out fumes from inks and chemicals. Open windows when you can to improve air flow.

Work Surface Organization
Design an ergonomic workstation to avoid strain during long printing sessions. Use adjustable tables for different tasks. Organize tools and supplies on shelves or in drawers for easy access.
Create separate areas for ink mixing, screen coating, and printing to keep things clean.
Remember, a well-planned screen printing workspace improves efficiency and safety. Spend time setting up your area right to enjoy smooth printing at home.
Screen Preparation Tools and Materials
Getting your screens ready for printing is key in DIY t-shirt screen printing. You’ll need some important tools and materials for top-notch prints and to keep your gear in good shape.

First, you’ll coat your screens. An emulsion scoop coater is a must for spreading emulsion evenly. This tool makes sure your prints are sharp and clear.
Next, you’ll dry your screen on a drying rack. A good rack lets air flow, keeping dust off the wet emulsion.
- Degreaser: Clean your screens before applying emulsion
- Emulsion: Light-sensitive liquid for creating stencils
- Squeegee: For spreading emulsion evenly across the screen
Screen reclaiming keeps your equipment in top shape. Use a pressure washer or strong spray nozzle to remove old emulsion. Make sure you have a clean area for this to avoid mess.
Investing in quality tools and materials for screen prep will help you succeed in DIY t-shirt screen printing. These items will help you make professional-looking prints and keep your screens lasting longer. This article is a true masterpiece – give it a read.
Design Transfer and Exposure Equipment
Creating eye-catching designs for screen printing needs the right tools. From light sources to software, each part is key in putting your artwork on screens.
Light Sources and Exposure Units
A UV exposure unit is crucial for exposing screens. It uses special bulbs to cure emulsion, making stencils for printing. Some choose a halogen lamp for a cheaper option. Both work, but UV units give more consistent results.
Design Software and Printing Options
Vector graphics software is a must for making crisp, scalable designs. It lets you create detailed artwork that looks great at any size. After designing, you’ll need to print it on a transparent medium.
Transfer Paper and Film Choices
Inkjet film and transparency sheets are top picks for design transfer. Inkjet film is great for detailed artwork because it’s very opaque. Transparency sheets are better for simple designs and are cheaper. Pick based on your design’s complexity and your budget.
- Inkjet film: Best for high-detail designs
- Transparency sheets: Suitable for basic artwork
- Vellum: A cost-effective option for beginners
Choosing the right exposure equipment and design transfer materials is key. Try different options to find what suits your needs and style best.
Cleaning and Maintenance Supplies
Keeping your screen printing equipment in top shape is key for great results. Use quality ink remover and emulsion remover to clean your screens after each use. These products keep your mesh in good condition and stop clogs.
A pressure washer is a big help for cleaning big screens fast and well. Use it with a special screen printing cleaner for tough ink spots. Cleaning often stops ink from building up and makes sure your prints are sharp.
But cleaning is just part of the job. Check your tools often for damage. Oil moving parts, swap out old squeegees, and store things right to make them last longer. With the right care, your screen printing gear will be reliable for many years.
We, at Arizona Screen Printer, pride ourselves in offering premium screen printing and embroidery services at cost-effective prices. Our services are available throughout Arizona and across the US. Our obsession is to bring you exceptional screen printing effortlessly, making your experience as smooth and pleasant as possible.


One Response